
How to Build Bitcoin Mining Rig: A Practical Setup Guide for Beginners and DIY Miners
What this guide will help you do
If you are researching how to build bitcoin mining rig setups, you are probably trying to sort out a handful of practical questions at the same time. What hardware do you actually need? What does a real setup cost? Can you run one at home without driving your household insane? And is any of this still worth doing now that Bitcoin mining is so much more competitive than it once was?
This guide tackles those questions without the hype. You will get the bitcoin mining basics, the difference between old GPU thinking and modern ASIC reality, the parts that matter, the setup process, and the mistakes that consistently catch beginners off guard.
One thing to be clear about upfront: this is not a profit guarantee. Mining can work, but only when you treat it like a hardware and energy project with honest numbers behind it. The right place to start is figuring out whether building a rig actually makes sense for you.
Before you buy anything: is a Bitcoin mining rig still worth building?
Before any money changes hands, it helps to understand what Bitcoin mining actually looks like today. In most serious cases, it is done with ASIC machines, not GPUs. An ASIC miner exists for one purpose: to run Bitcoin mining calculations far more efficiently than any general purpose graphics card can manage.
That matters because a lot of people searching how to build a bitcoin mining rig are picturing a custom PC build. For Bitcoin specifically, that approach is mostly outdated. GPU rigs still have a role in certain crypto niches, and this breakdown of whether GPU mining is still viable helps put that shift into perspective.
Then there is the profitability question. Your results depend on four things: hardware efficiency, mining difficulty, the bitcoin price, and your electricity cost. If your power rate is high, even a technically solid miner can slip into unprofitable territory faster than you expect.
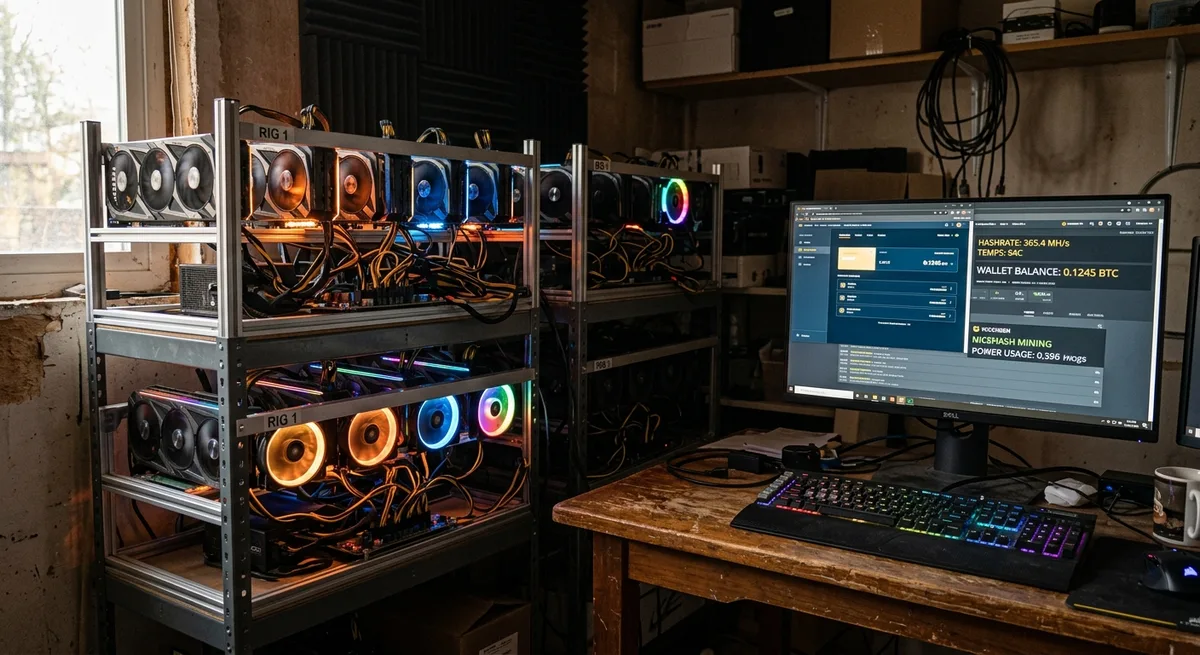
And then there is the practical reality. ASICs are loud. Really loud. They generate serious heat and need stable power and proper ventilation. A single home unit can sound like something you would find in a server room, which is a long way from quietly running a desktop in a spare bedroom.
So is it still worth building? Sometimes, yes. For some people it is a genuine learning project. For others it is a way to stack sats with a long term view. But for most beginners, the smartest move is to model the costs first and buy the hardware second.
Understand the difference between hobby mining and serious mining
Hobby mining is mostly about learning. You want to understand how the process actually works, run a machine yourself, and see it from the inside. In that case, a small home setup can make sense even if the profit margin is thin. You are paying partly for the experience, and that is fine.
Profit focused mining is different. The numbers need to work. You care about hash rate, power draw, uptime, and payout consistency. Mining difficulty makes this harder over time, because as network competition increases, the same machine earns less unless price or efficiency improves to compensate.
Then there is the small farm model. That is where people start thinking about running multiple units, planning better airflow, handling dedicated electrical circuits, and setting up some form of monitoring. At that point the project starts looking more like infrastructure than a hobby.
Your budget and technical comfort both matter here. If you are still figuring out whether you can handle installation, networking, and ongoing maintenance, this guide on hardware requirements for solo mining is worth reading before you go further.
Once you know whether you are building to learn, to earn, or to scale, the right rig type becomes much easier to choose.
Choosing the right rig type for your goal
When people search how to build bitcoin mining rig setups, they often mean quite different things. Some want the cheapest possible entry point. Others want the most efficient machine they can afford. Some are figuring out how to set up bitcoin mining at home, while others are asking how to setup a bitcoin mining server with remote access and more serious infrastructure behind it.
For Bitcoin, the main decision is usually not GPU versus ASIC in any practical sense. It is which ASIC and which operating model fits your situation. If you want broader context on how different hardware categories serve different use cases, this overview of which hardware is best for altcoin mining is a helpful frame of reference.
A budget build makes sense if you want to test the process with limited risk. A performance focused build makes sense if energy efficiency and long term operation matter more than keeping the purchase price low. A home setup needs careful noise and airflow planning. A server style setup leans toward rack placement, remote monitoring, and cleaner electrical design.
The right answer depends less on what sounds impressive and more on what your power, space, and budget can realistically support.
How to build a cheap bitcoin mining rig
If you are looking for how to build a cheap bitcoin mining rig, the word cheap needs a realistic definition. In mining, cheap does not mean grabbing random low quality parts. It means reducing upfront cost without creating bigger operating problems down the line.
The safest places to save money are usually non critical accessories: a used frame, basic shelving, networking gear, or dust management accessories. On the miner itself, used units from a reputable seller with verifiable performance history can sometimes offer genuine value.
Where you should not cut corners is power delivery, cooling, and hardware condition. A weak power setup creates shutdowns and safety risks. Poor ventilation shortens equipment life. A heavily worn miner with hidden fan or board issues can turn a bargain into a repair project that costs more than buying properly in the first place.
A solid mining rig budget starts with three numbers: maximum hardware spend, monthly electricity estimate, and break even timeline. If any one of those already feels uncomfortable, a cheaper machine is not automatically the better choice. It might just lock you into higher operating costs.
How to build the best bitcoin mining rig
If your goal is the best bitcoin mining rig you can build, think beyond raw speed. The best rig is usually the one with the strongest balance of hash rate, efficiency, stability, and thermal control.
Hash rate measures mining performance, but efficiency matters just as much. A machine that draws less power per unit of work can outperform a faster but less efficient unit over time, especially in regions with medium or high electricity rates. You might be surprised how much that gap adds up over twelve months.
Reliability also matters more than most beginners expect. A miner that runs cooler, crashes less, and needs less intervention can quietly outperform something with better headline specs but weaker uptime. If you are comparing newer models, this list of top energy efficient mining hardware is a strong starting point.
The best setup usually comes down to choosing an ASIC with proven performance, pairing it with stable power, and giving it enough airflow to run consistently over the long haul.
How to setup a bitcoin mining server
When people ask how to setup a bitcoin mining server, they usually mean a more organized and scalable environment rather than one machine sitting on a shelf. This can include rack mounted miners, dedicated switches, stronger ventilation, cleaner cable routing, and some form of remote monitoring.
The key idea for beginners is separation and control. A server style setup keeps mining hardware in a dedicated space with stable internet, predictable cooling, and power circuits designed for sustained load. It also makes maintenance easier because each unit has a defined place, labeled connections, and clear airflow paths.
You do not need enterprise level gear to think this way. Even a well organized garage or utility room can work with server style discipline. The more machines you add, the more valuable that structure becomes.
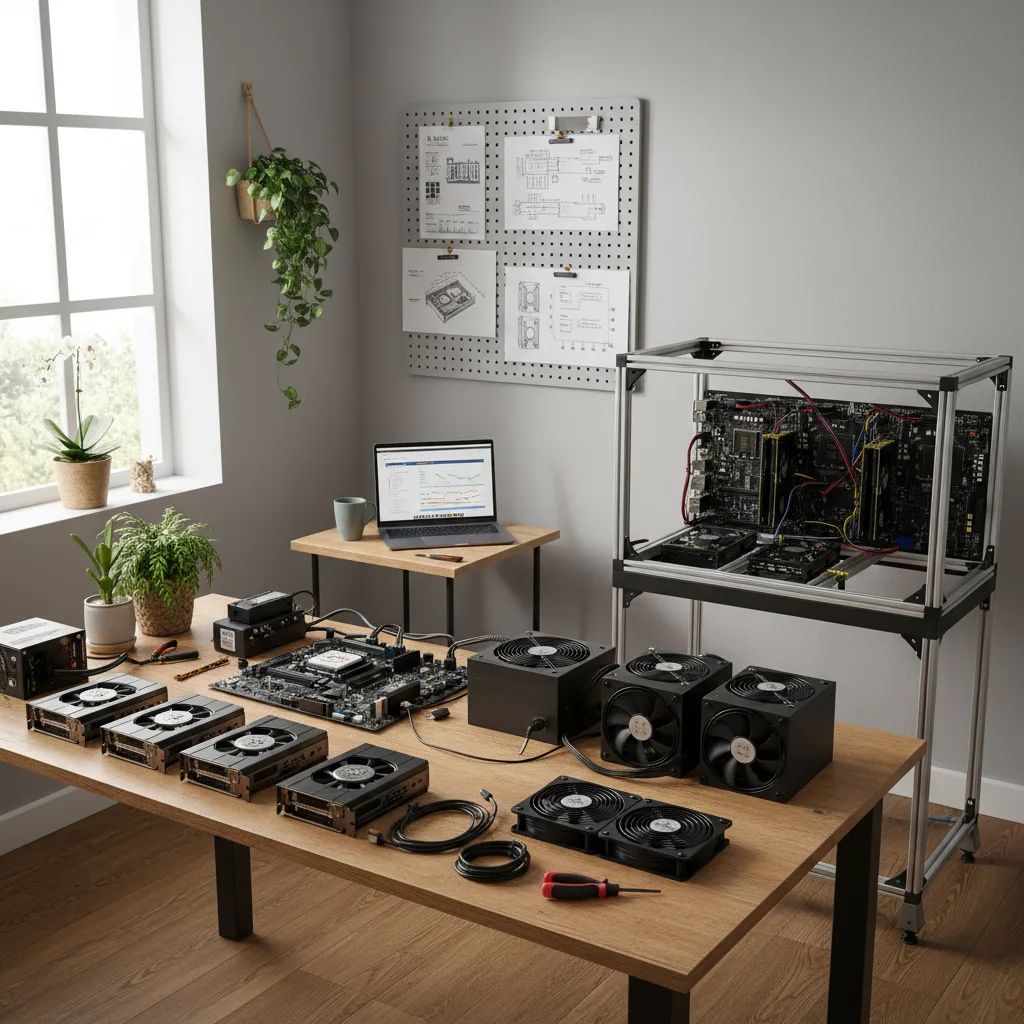
Parts list: what you need to build a bitcoin mining rig
A modern Bitcoin mining setup can be surprisingly simple or more involved depending on the rig type. In most ASIC based cases, you need far fewer traditional PC parts than you would for a GPU build. If you want a broad overview of affordable bitcoin mining hardware and supporting gear, this guide to the hardware you need to strike crypto gold is worth a look.
Here is the practical checklist of mining rig components:
Essential items:
- ASIC miner
- Compatible power supply unit if not integrated
- Ethernet connection
- Router or network switch access
- Stable electrical outlet or dedicated circuit
- Ventilated location
- Wallet for payouts
- Mining pool account if pool mining
Often useful:
- Metal shelf or frame
- Surge protection
- Smart plug or power monitoring device
- Temperature and humidity monitor
- Dust filters or intake management
- Spare fan
Optional depending on setup:
- Rack hardware
- Remote monitoring tools
- Sound dampening materials
- Exhaust ducting
- Backup internet option
Some people still think in terms of motherboard, storage, and RAM because of older PC based mining guides. Those matter in non ASIC builds, but for most Bitcoin specific setups, the required hardware is much more focused.
Core hardware
The core hardware starts with the miner itself. In an ASIC setup, that is the main unit doing all the work. Many ASICs include built in control boards, which means you do not need a separate motherboard, desktop CPU, or standard storage drive the way you would with a PC build.
If you are building around non ASIC hardware for learning purposes, then motherboard compatibility, RAM, storage, risers, and a frame all come back into the picture. For Bitcoin proper, though, that path is usually less practical.
Your power supply unit is critical. Some ASICs come with integrated or matched power solutions, while others need a specific PSU model. Always confirm compatibility and wattage requirements before buying. You will also need ethernet cables, a reliable router connection, and enough physical support for the weight and vibration of the hardware. These machines are heavier and rattlier than they look in the product photos.
Power and electrical planning
Bitcoin mining rig power consumption is one of the biggest make or break factors in any setup. A modern ASIC draws a large continuous load, which means you need to think about outlet capacity, breaker limits, cable quality, and surge protection before you ever flip the switch.
A common beginner mistake is assuming any wall outlet will handle it. In reality, you need to know the voltage available, the amperage limit on the circuit, and what else is already sharing that line. Continuous high load on a busy household circuit can trip breakers or create heat issues in the wiring itself.
Electrical safety starts with honest math. Check the machine’s wattage, convert that to current draw for your voltage, and stay within safe limits. If you are not sure, ask an electrician. This is genuinely not the place for guesswork. For a deeper look at power planning, see the best electricity sources for crypto mining.
Cooling and airflow essentials
Bitcoin mining rig cooling is not an optional extra. Thermal management is part of the build itself. ASIC miners move a lot of air for a reason: they produce heat constantly, and that heat has to leave the room efficiently or performance will suffer.
Start with placement. Do not push a miner into a closed cabinet or tight corner. Give it intake and exhaust space. Think of airflow as a straight line: cool air in, hot air out, minimal recirculation.
Fans, room ventilation, exhaust routing, and ambient temperature all matter. Basements and garages can help if they stay cool and dry. Dust management matters too, because clogged fins and fans quietly reduce performance over time. If you want a deeper dive, the best cooling solutions for your mining farm covers this in more detail.
How to build a bitcoin mining rig step by step
The core process is simple in concept: prepare the space, place the machine, connect power and ethernet, power it up, and configure it properly. The details are what keep the setup safe and stable over time.
For a broader assembly perspective, this step by step guide to building the perfect rig is a useful companion.
Step 1: Prepare the space
Choose a location with good airflow, consistent power access, and stable internet. A good home mining setup also gives you enough room to inspect fans, reach cables, and clean dust without having to dismantle everything first.
Leave clearance around intake and exhaust sides. Keep the rig off carpet if possible, and avoid damp rooms or spaces with heavy dust or pet hair. If the machine will run anywhere near where people spend time, think about noise before you commit to the spot.
Step 2: Assemble and connect the hardware
Place the miner securely on a stable shelf, frame, or rack. Keep it level and make sure nothing is blocking the airflow openings. Route power and ethernet cables cleanly so they are not stretched, sharply bent, or sitting in the path of hot exhaust.
Connect the PSU exactly as the manufacturer specifies. Good cable management is not just about tidiness. It makes inspection easier, reduces accidental disconnections, and helps air move freely through the machine.
Before powering on, do a slow visual check. Confirm every connector is seated correctly, the outlet and circuit are appropriate, and the ethernet line is active. It takes a minute and can easily save you hours of troubleshooting later.
Step 3: Power on and run initial checks
Turn on the miner and watch the first few minutes carefully. Listen for fan spin up, check indicator lights, and confirm the unit appears on your network. Most miners let you access a local interface through your router or an IP scanning tool.
Is the machine receiving stable power? Is it connecting to the network? Are fans running normally? Are temperatures rising into a normal operating range rather than climbing dangerously? These are simple checks, but they matter.
Do not walk away immediately. Let it run long enough to confirm normal behavior before you leave it unsupervised. Once the hardware looks healthy, the next step is configuring software and pool settings so it can actually start mining.
How to set up bitcoin mining rig software and network settings
With the hardware running, you need to handle the software side. In most ASIC setups, that means accessing the miner dashboard, checking firmware, entering pool details, and making sure your wallet address is correct.
If you want a related walkthrough from the solo mining angle, this step by step solo mining setup guide adds useful context.
Log into the miner’s interface using its local IP address. Change the default credentials if you have not already. Check whether a firmware update is recommended by the manufacturer. Be cautious and deliberate about firmware decisions, especially on older hardware, but running outdated software can create stability and security problems.
Next, enter your pool configuration details: the pool URL, worker name, and payout wallet address. Give each machine a clear worker name so you can identify it easily if you add more units later.
Once you confirm the dashboard shows active hashing, accepted shares, and stable temperatures, the setup is essentially live. The next decision is how you want to mine.
Pool mining vs solo mining
A mining pool combines your machine’s work with other miners and pays out smaller, more regular rewards based on your contribution. For most beginners, this is the practical path because payouts are more predictable and you are not sitting around waiting for a result that may never come.
Solo mining means your machine works independently. If you solve a block, you keep the full reward. The problem is probability. For a small miner, the odds are low enough that payouts can be extremely irregular, sometimes for very long stretches.
That is the core tradeoff between pool mining and solo mining. Pool gives steadier results. Solo is higher variance and usually only makes sense for specific goals, larger hash power, or personal reasons.
Wallet and payout configuration
Before mining starts, set up a wallet that supports receiving Bitcoin securely. Double check the wallet address before saving it in your pool settings. A wrong address means your payouts go somewhere else, and there is typically no way to get them back.
Set your payout threshold based on expected earnings and your pool’s rules. Smaller thresholds mean more frequent transfers. Larger ones reduce payout frequency. Also enable basic security on your pool account: a strong password and two factor authentication if available.
How to set up bitcoin mining at home without creating avoidable problems
Home mining can work, but only if you respect the limits from day one. Noise, heat, ventilation, and household power are not afterthoughts.
Sound is the most common issue. Many ASICs are far too loud for normal living spaces. You get used to a lot of things, but a jet engine in the spare room is not one of them. Heat is next. Even one machine can noticeably raise a room’s temperature. Then there is maintenance. Home mining works best when you can access the unit easily for cleaning and checks.
Noise reduction helps, but it should never come at the expense of airflow. Internet stability matters too. Mining does not need huge bandwidth, but it needs a reliable connection. Frequent drops hurt uptime and earnings.
Best locations inside the home
Basements are often the best option if they are dry and properly ventilated. They offer cooler air, some sound isolation, and distance from main living areas.
Garages work well too, especially if they are not exposed to extreme heat or heavy dust. Utility rooms are practical when there is ventilation and enough space. Spare rooms are usually the weakest choice because of noise and heat accumulation. Sheds can work if you manage ventilation, temperature swings, and security properly.
In every case, ventilation is the deciding factor. You need a place where hot air can leave the area instead of cycling straight back into the miner.
Ongoing maintenance for a home rig
Mining rig maintenance becomes much easier when you stick to a simple routine. Check dust buildup regularly. Inspect fans for unusual noise or reduced airflow. Review temperature and uptime data so you can catch problems before performance drops.
Keep firmware current when updates are stable and relevant. Watch for sudden changes in hash rate, rejected shares, or recurring disconnects. Those are early signs that something is wrong, whether heat, networking, or hardware wear.
A home rig does not need constant attention. But it does need consistent attention. There is a difference.
Cost breakdown: what it takes to build and run a mining rig
Mining costs are not just the sticker price of the machine. A realistic setup cost includes hardware, electrical accessories, cooling, internet, maintenance items, and eventual replacements.
Start with equipment: the miner, power components, shelving or mounting, surge protection, and ventilation. Then calculate monthly power use based on actual wattage and your local electricity rate. Add any cooling cost if the room needs extra fans or climate control.
Do not ignore smaller expenses. Replacement fans, dust management, cables, and downtime all affect the real cost of ownership. The profitability of small scale bitcoin mining often looks better on paper than it does once those details are actually counted.
Upfront costs vs long-term costs
Upfront costs are what you pay to get started. Long term costs are what determine whether the project stays sensible. A cheaper miner with poor efficiency can cost more over time than a better unit with a higher purchase price, especially when you run the electricity numbers month by month.
This is where return on investment becomes more useful than simple budget thinking. If one machine draws significantly less power for similar output, it may recover the higher initial cost through lower bills and better overall mining efficiency.
Factor in hardware aging too. Mining gear does not hold peak value forever. Difficulty rises, newer hardware enters the market, and repairs become more likely over time. Model both initial and recurring costs clearly, and you are in a much better position to decide whether to stay small or eventually scale up.
How to make bitcoin mining farm: when and how to scale beyond one rig
Once one machine runs reliably, it is natural to start thinking about expansion. But learning how to make bitcoin mining farm setups work is less about buying more units and more about designing proper systems around them.
Mining farm design starts with space. Multiple machines need organized placement, clear intake and exhaust paths, labeled power distribution, and accessible maintenance lanes. Then comes monitoring. Once you have more than one or two units, manual checking becomes inefficient quickly.
Power distribution becomes much more important too. What works for one rig on a household circuit does not automatically scale. You may need dedicated circuits, better ventilation planning, and some form of remote oversight. For readers exploring more self managed infrastructure, this guide on how to build a self sustaining mining setup is a useful next step.
For most beginners, scaling only makes sense after one rig is stable, costs are well understood, and your environment can genuinely support expansion.
Energy options for larger operations
At larger scale, renewable energy mining starts to make more sense because power cost has a bigger effect on long term performance. Conventional grid power is still standard for most operators, but solar, wind, and hybrid models can work depending on location and budget.
If you are exploring solar specifically, this guide on how to set up a solar powered crypto mining operation is a practical reference.
The key point is that energy strategy should follow real numbers, not marketing language. Renewable systems can help, but they require their own investment, storage planning, and reliability analysis. Before scaling, make sure you are not carrying beginner level mistakes into a much larger setup.
Common mistakes when building a bitcoin mining rig
Most beginner mining mistakes are not dramatic. They are usually basic planning errors that quietly compound over time.
The first is underestimating electricity costs. The second is poor airflow. The third is bad placement, like trying to run an ASIC in a room that genuinely cannot handle the noise or heat. Other common errors include buying incompatible accessories, ignoring network stability, and treating revenue calculator estimates as guarantees.
Chasing the lowest upfront price without considering operating efficiency is another one that catches people out. A miner that looks affordable can become expensive if it runs hot, draws too much power, or fails more often than expected.
Most of these mistakes are preventable when you treat the build like a systems project rather than a shortcut to passive income.
Troubleshooting basic rig issues
If the miner does not start, begin with power. Check the outlet, breaker, PSU connections, and the manufacturer’s recommended startup process.
If it powers on but does not appear on the network, check the ethernet cable, router port, and IP assignment. If temperatures are too high, inspect airflow first: intake and exhaust should be clear, fans should be running, and hot air should not be recirculating back into the machine.
If the hash rate is unstable, look at overheating, firmware issues, or pool connection problems. If the miner keeps disconnecting, test internet stability and confirm pool URLs and worker settings are correct. If the system shuts down under load, suspect electrical limits or overheating before anything else.
Simple troubleshooting is mostly about isolating one variable at a time. Change one thing, test again, and keep notes. That measured approach will serve you well throughout the life of the setup.
Conclusion
If you came here to learn how to build bitcoin mining rig setups properly, the main takeaway is simple: success starts before you buy the machine. Choose the right rig type for your goal, plan power and cooling carefully, assemble with attention to detail, and stay realistic about cost and bitcoin mining profitability.
For most people, the best starting point is one well planned setup rather than an aggressive expansion. Focus on stable power, safe airflow, clean software configuration, and a consistent maintenance routine. That is what builds real mining efficiency over time.
Mining can still make sense, but only when treated like a calculated project. If you are also thinking about the environmental side of long term operation, this guide on how to build a carbon neutral mining operation is worth reading next.
Run the numbers honestly, build from there, and adjust as you learn.