
How to Run a Bitcoin Node (Step-by-Step Guide)
H1: How to Run a Bitcoin Node (Step-by-Step Guide)
Running bitcoin node software means you’re choosing to verify Bitcoin yourself instead of trusting someone else’s server, wallet, or opinion. That sounds technical at first, but honestly, it’s more approachable than most people assume.
This guide is written with beginners in mind, but it’s accurate enough that you’ll also understand what’s actually happening in the background. We’ll cover what a node is, why people bother running one, what hardware and software you need, how to set everything up, and what problems to expect along the way.
By the end, you’ll have a clear sense of whether a full node bitcoin setup makes sense for you. To get there, it helps to start with what a node actually is.
H2: What It Means to Run a Bitcoin Node

Running a Bitcoin node means running software that connects to the Bitcoin network, downloads blockchain data, checks that data against Bitcoin’s rules, and shares valid information with other nodes. In simple terms: you’re operating your own verifier.
Most people interact with Bitcoin through exchanges or mobile wallets without ever thinking about the infrastructure underneath. But if you want to understand the network more directly, running a node is one of the most practical places to start. If you want a broader foundation first, this guide on What Is a Bitcoin Node? Guide is a useful companion.
Running a node doesn’t mean mining. It doesn’t earn you coins automatically. What it does mean is that you get a direct view into the network and reduce your dependence on third parties.
H3: What a Bitcoin node actually does
A Bitcoin node receives transactions and blocks from peers on the network and checks whether they follow consensus rules. That includes whether a transaction is properly formatted, whether signatures are valid, whether the coins being spent actually exist, and whether blocks follow Bitcoin’s accepted history.
This is how a node independently decides what’s valid. It doesn’t ask a company for permission or trust a random website’s data feed. It verifies.
That matters because Bitcoin works precisely because thousands of independent machines enforce the same rule set. If you want a simple walkthrough of the system behind that, How Bitcoin Works Explained gives useful context.
So when people ask how a bitcoin node validates transactions, the short answer is this: it checks them against Bitcoin’s rules before accepting and relaying them.
H3: Why people choose to run a node
The biggest reason is independence. A node lets you verify your own transactions and balances instead of trusting a wallet provider, exchange, or block explorer.
Privacy is another major factor. If you’re using someone else’s node, you often leak information about the addresses and transactions you’re looking up. Running your own setup reduces that exposure considerably. If privacy is part of your reason for being here, Bitcoin Privacy Explained is worth reading after this.
Some people run nodes to support decentralization. More independently operated nodes mean a more resilient network. Others do it purely as a learning project, especially developers and self-custody-focused users.
In plain terms, why run your own bitcoin node comes down to control, verification, privacy, and understanding. Once you’re clear on that, the next practical question is whether you need a full node or something lighter.
H2: Full Node vs. Lightweight Node: What’s the Difference?
The difference mainly comes down to trust and completeness.
A full node downloads and verifies the entire blockchain itself, checking Bitcoin’s rules directly. A lightweight node, often used in simpler wallets, relies more heavily on external servers for some of that information. Easier to use, less demanding on storage, but it means placing more trust in third-party infrastructure.
This is the core of the bitcoin node vs light node distinction. One gives you maximum independence. The other gives you convenience with some compromise. There’s no universal right answer.
H3: When a full node makes sense
A full node makes sense if you care about strong verification, more control, and better privacy. It’s especially useful if you’re serious about self-custody, want to connect your own wallet infrastructure, or prefer not to outsource trust to anyone.
If you use hardware wallets or want to understand how wallets interact with the network, Bitcoin Wallets Explained can help connect the dots.
A full node bitcoin setup also makes sense if you’re planning to build on top of Bitcoin later, such as adding Lightning or self-hosted tools. If that level of control matters to you, the hardware and setup effort is usually justified.
H3: When a lightweight setup may be enough
If you’re just starting out, making occasional transactions, or primarily treating Bitcoin as an investment rather than a self-hosted financial system, a lightweight setup may be perfectly fine for now.
For many beginners, the most practical move is to learn Bitcoin first, then graduate to a node later. Lightweight wallets are faster to install, easier to maintain, and require far less storage.
The trade-off is that you don’t get the same level of independent verification. You’re outsourcing part of the trust model. That might be acceptable for your current stage, but if you want full control eventually, you’ll want to look at the requirements to run a bitcoin node properly.
H2: What You Need Before You Set Up a Bitcoin Node
Before you start, it helps to set realistic expectations. A bitcoin full node setup isn’t complicated because the steps are mysterious. It’s mostly about having enough storage, a stable internet connection, and patience for the blockchain synchronization process.
The initial sync can take many hours or even days depending on your hardware and connection. That’s completely normal. Running a node is less about technical brilliance and more about using suitable equipment and letting the software do its job.
Here are the practical requirements to run a bitcoin node before installation starts.
H3: Hardware requirements
The best hardware for a bitcoin node doesn’t have to be expensive, but it does need to be reliable.
At minimum, you want a modern 64-bit processor, at least 4 GB of RAM, and an SSD with enough free space. In practice, 8 GB of RAM and a 1 TB SSD is a much more comfortable starting point. SSD storage matters because the database reads and writes are heavy. A spinning hard drive technically works, but it will make syncing noticeably slower and more frustrating.
You can run a node on a desktop, laptop, mini PC, or dedicated low-power machine. Running a bitcoin node on Raspberry Pi-style hardware is possible, but performance depends heavily on the storage setup and the exact model. Better suited to users who are comfortable with slower sync times and a bit more tinkering.
A virtual private server is also an option, though it changes the privacy and trust model. The right environment depends on your goals.
H3: Software and operating system options
For most people, Bitcoin Core is the standard choice. It’s the reference client, widely used, and the default recommendation for a straightforward bitcoin node installation.
Bitcoin Core supports Windows, macOS, and Linux. The process is broadly similar across all three, though installers and file paths differ slightly. If you’re on Linux, you may choose package-based or manual installation depending on your preference.
There are other bitcoin node software options in the ecosystem, but if your goal is reliability and a clean setup experience, Bitcoin Core is usually where to start.
H3: Internet, bandwidth, and uptime expectations
A full node needs to download the Bitcoin blockchain and stay in sync with new blocks and transactions. That means significant initial data usage and ongoing bandwidth afterward.
The first sync is the demanding part. Depending on your system, the bitcoin blockchain synchronization process can take anywhere from less than a day to several days. Faster SSDs, stronger CPUs, and better internet all help.
Ongoing uptime matters too. Your node doesn’t need to be online every second, but the more consistently it runs, the more useful and reliable it becomes. A stable home connection is usually enough. With that foundation in place, you’re ready for the actual setup.
H2: How to Set Up Bitcoin Node Software Step by Step
This is the practical core. If you’ve been wondering how to set up bitcoin node software without getting buried in technical noise, this is the sequence to follow.
The exact screens vary by operating system, but the overall process is the same. Download the software, install it, choose storage, configure the basics, sync the blockchain, optionally open network ports, and confirm the node is working.
H3: Step 1: Download Bitcoin Core from the official source
Go to the official Bitcoin Core website and download the installer or package for your operating system. Avoid third-party download sites, unofficial mirrors, or links from random forums. This matters because node software is security-sensitive. A fake installer could compromise your machine or wallet environment.
If you’re more advanced, you can verify release signatures, which adds another layer of confidence. Once the software is safely downloaded, the next decision is where the blockchain data will live.
H3: Step 2: Install the software and choose your data directory
Run the installer and follow the normal setup process for your platform. During first launch, Bitcoin Core will ask where to store blockchain data.
Choose a drive with enough free space, and use an SSD if at all possible. This is one of the most important practical decisions in the entire process. If the drive is too small or too slow, the experience will be frustrating and you’ll eventually run out of room anyway.
If you’re planning a full storage setup, leave plenty of headroom because the blockchain keeps growing. If storage is tight, pruning is an option we’ll cover in the next step.
H3: Step 3: Configure basic settings
Bitcoin Core lets you choose between a full node that stores the complete blockchain and a pruned node that verifies everything but only keeps part of the historical data on disk.
Pruning is useful if storage is limited. You still get independent validation, but you don’t keep the entire chain available locally. For many users, that’s a sensible middle ground. If you want maximum flexibility for other applications, full storage is better.
You can also configure whether the software starts automatically when your computer boots. More advanced users might edit configuration files later for RPC access, custom indexing, or network behavior, but beginners don’t need any of that on day one.
After these basics are set, the longest part begins.
H3: Step 4: Let the blockchain sync completely
This stage is called the initial block download. Your node downloads historical blocks, verifies them one by one, and catches up to the current chain tip. Picture your node quietly working through years of Bitcoin history, block by block, while you go make coffee.
Don’t be surprised if this takes a while. Sync speed depends on CPU performance, disk speed, RAM, internet quality, and whether your machine is doing other heavy tasks in the background.
During this phase, the node isn’t fully useful yet because it hasn’t finished verifying the complete chain state. Be patient and let it complete. This is normal, and it’s part of what gives a full node its value. When sync finishes, your node becomes a live, independent verifier.
H3: Step 5: Open the right network ports if you want inbound connections
By default, your node makes outbound connections to peers. If you want other peers to initiate connections to your node, you usually need to forward port 8333 on your router to the machine running Bitcoin Core.
This is optional. Your node can still function without inbound connections. But allowing inbound peers helps your node contribute more to the network by serving data directly to others.
The exact steps depend on your router. Look for port forwarding settings and point TCP port 8333 to your node’s local IP address. Some firewalls may also need adjustment.
If you’re not comfortable with this yet, skip it for now. You can always come back to it later.
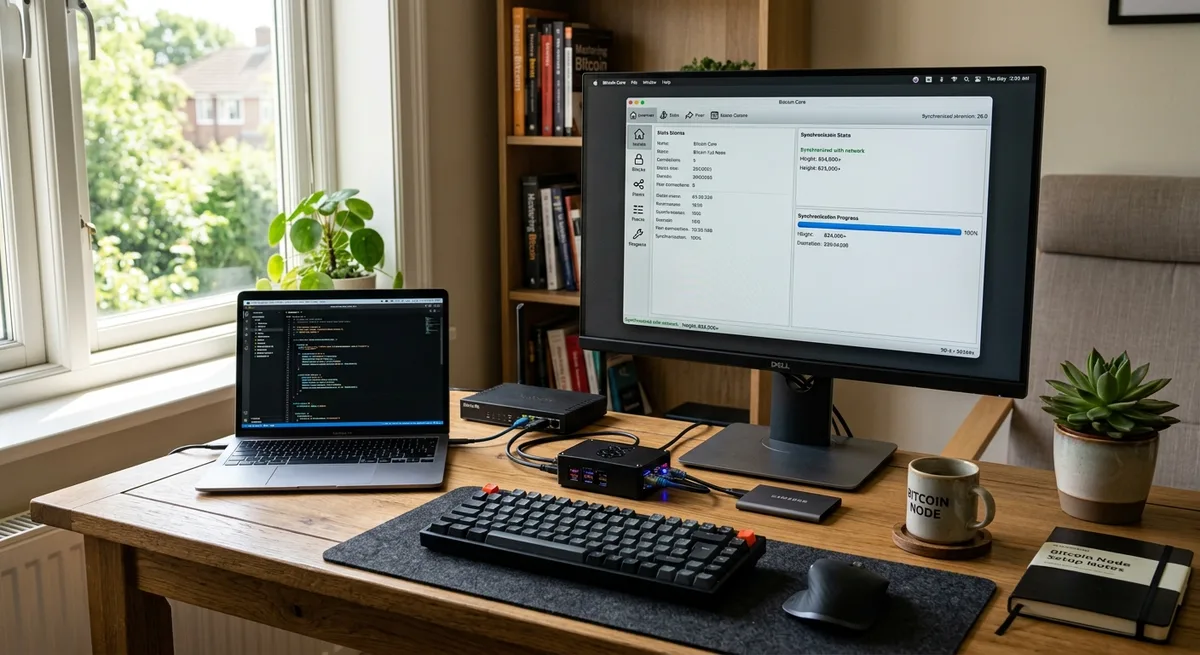
H3: Step 6: Verify that your node is working properly
Open Bitcoin Core and check the sync status, current block height, and peer connections. A healthy node should show that it’s caught up with the network and connected to several peers.
New blocks should be arriving roughly every ten minutes on average. If the block height keeps updating and peer connections remain stable, your node is doing its job.
This is also the point where using your own node starts to matter more in practice. Once connected to wallets or tools, you can verify your own activity directly. If you want a clearer picture of what your node is actually observing on chain, Bitcoin Transactions Explained Step by Step helps make that concrete.
H2: Best Ways to Run Bitcoin Node Setups
There’s no single best setup for everyone. The right choice depends on budget, privacy expectations, uptime, and how much friction you’re willing to accept.
Some people want the fastest path to learning. Others want a quiet, always-on machine running in the corner. More advanced users may prefer a virtual setup for experimentation. Each option has trade-offs, so it helps to be honest about how you’ll actually use the node.
H3: Running a node on your personal computer
This is the easiest route for beginners. You already have the machine, the installation is straightforward, and it’s a good way to learn how the software actually behaves.
The downside is convenience. If you shut down your computer often, run heavy applications, or have limited free storage, the node may be slower and less reliable. It can also compete with your normal work for resources.
Still, for a first bitcoin full node setup experience, a personal computer is often the most practical starting point. If you like what you see, you can always move to dedicated hardware later.
H3: Running a node on dedicated hardware at home
A separate device gives you a cleaner and usually better experience. It can stay online continuously, it doesn’t interfere with your daily work, and it’s easier to treat as part of your personal Bitcoin infrastructure. There’s something satisfying about a small box sitting quietly on a shelf, just running.
This is where mini PCs and low-power home servers shine. Better uptime, better stability, and lower friction once everything is configured. The cost of running a bitcoin full node at home is usually modest, especially with efficient hardware. For people who care about privacy, self-custody, and reliability, dedicated hardware is often the sweet spot.
H3: Running a node in a virtual or cloud environment
You can run a node on a VPS or cloud server, and for testing or development that can be genuinely useful. Deployment is fast, uptime is strong, and remote management is convenient.
But there’s a catch. You’re placing your node on infrastructure controlled by someone else. That affects privacy, trust, and sometimes cost. Monthly fees add up, and your provider can see network-level information that wouldn’t be exposed the same way on a local home machine.
So yes, it’s possible, but if your main reasons for running a node are sovereignty and privacy, a home setup is usually more aligned with those goals.
H2: Benefits and Trade-Offs of Running Your Own Bitcoin Node
There are real benefits of running a bitcoin node, but there are also real costs and limitations. Better to be clear about both upfront.
Running a node improves your position inside the Bitcoin system, but it’s not a shortcut to profit and it’s not mandatory for every user. The value depends on what you actually want from Bitcoin.
H3: Key benefits
The biggest benefit is independent verification. You don’t need to trust an exchange, wallet provider, or blockchain explorer to tell you what’s true. You check it yourself.
You also improve privacy, especially when you connect your own tools and avoid leaking address lookups to third-party servers. This can strengthen your overall self-custody setup considerably.
There’s real educational value too. Few things teach Bitcoin as effectively as watching a node verify the chain in real time. And beyond personal gain, you contribute to bitcoin network resilience by adding another independently validating participant.
H3: Realistic drawbacks
Storage requirements grow over time. Initial sync takes real time. Hardware matters more than many people expect. There’s some electricity cost, some bandwidth usage, and occasional maintenance.
You may also need to learn a few networking basics if you want inbound connections or wallet integration. None of it is impossible, but it is still effort. And if you’re hoping this earns you something automatically, it doesn’t. This is not mining, staking, or passive income. It’s infrastructure. Approach it with that mindset and the trade-offs make much more sense.
H2: Common Problems When You Run Bitcoin Node Software
Most node issues aren’t catastrophic. They’re usually a mix of limited hardware, network friction, or storage constraints. The key is to troubleshoot calmly. If you understand the likely cause, the fix is often straightforward.
H3: Slow synchronization
Slow sync is one of the most common bitcoin node issues. The causes are usually predictable: a slow disk, weak CPU, unstable internet, or too many background applications competing for resources.
The biggest performance upgrade is almost always moving to SSD storage. Closing heavy applications can also help. On lower-power hardware like older laptops or small boards, patience is genuinely part of the answer.
If sync feels stuck, check whether blocks are still progressing slowly rather than not moving at all. Slow is annoying. It’s different from broken.
H3: Not enough storage space
If your drive fills up during sync, the node may stop working properly or fail to continue. This is exactly why planning storage in advance matters.
If you don’t need the full historical chain stored locally, pruning solves the problem neatly. You still validate the chain, but disk usage drops significantly. For many users, that’s a smarter choice than forcing a full archival setup onto a drive that can’t handle it. Blockchain size will keep growing, so leave margin if you can.
H3: Connection or peer issues
If your node shows very few peers or no inbound connections, the problem is usually a firewall, router setting, VPN conflict, or port forwarding issue.
Start simple. Check that your internet is stable and that Bitcoin Core is allowed through your system firewall. If you’re using a VPN, test whether it’s interfering. If inbound connections matter to you, verify that port 8333 forwarding is correctly set on your router.
Limited peers don’t always mean failure, but if the node can’t maintain healthy connections, it will sync and relay less effectively.
H3: Node running, but wallet apps are not connecting
This usually happens because the wallet app is still pointed at a public server instead of your local node, or because extra configuration is needed for RPC or Electrum-style access.
The fix depends on the wallet. Some connect directly to Bitcoin Core. Others need a bridge service. Either way, this matters because using your own node only improves verification and privacy if your wallet is actually talking to it. So if the node is running but your app still behaves like before, check the connection settings carefully.
H2: Can You Use Your Node with the Lightning Network?
Yes. A Bitcoin node can act as the on-chain foundation for a Lightning setup. Many Lightning implementations rely on access to a fully synced Bitcoin node to monitor the chain, confirm channel activity, and interact with the base layer securely.
If you plan to go in that direction, it helps to understand Lightning first rather than treating it as just an add-on. What Is Lightning Network? Bitcoin Scaling gives a solid overview.
You don’t need Lightning to justify running a node. But once your base node is stable, it opens the door to more advanced self-hosted Bitcoin use cases.
H2: Is Running a Bitcoin Node Worth It for You?
It depends on your goals.
If you want to understand Bitcoin more deeply, verify your own activity, improve privacy, or build a stronger self-custody setup, then yes, it’s often worth it. If you just want to buy and hold a small amount with minimal effort, it may not be necessary yet.
The good news is that this isn’t an all-or-nothing decision. You can start simple, learn as you go, and upgrade your setup later if it proves useful.
H3: Best fit for beginners
For beginners, running a node can be a valuable learning project even if you don’t keep it running forever. Installing Bitcoin Core on a regular computer teaches you how the network behaves and what independent verification actually means in practice.
You don’t need the perfect setup on day one. You need a realistic one. Start with the hardware you have, accept that sync will take some time, and treat it as a practical experiment rather than a test of expertise. That mindset removes a lot of pressure.
H3: Best fit for advanced users
For advanced users, a node becomes much more than a learning tool. It can anchor wallets, privacy tools, APIs, Lightning infrastructure, and broader self-hosted services.
At that stage, the value compounds because the node becomes part of a larger system you control. Dedicated hardware, inbound connectivity, wallet integration, and custom indexing all start to make more sense. The right question isn’t whether everyone should run a node. It’s whether it improves your own setup enough to justify the effort.
H2: Conclusion
If you want more control, better verification, and a deeper understanding of Bitcoin, learning to run bitcoin node software is one of the most useful practical steps you can take.
You don’t need enterprise hardware or expert-level skills to get started. You need decent storage, a stable connection, some patience during sync, and a clear reason for doing it. For some people that reason is privacy. For others it’s self-custody, learning, or contributing to the network in a meaningful way.
Start with a setup that matches your current skill level. A personal computer may be enough to begin. A dedicated home device may be the better long-term move. Either way, when you run bitcoin node infrastructure yourself, you stop observing Bitcoin only from the outside and start interacting with it on your own terms.